Showing posts with label mittens. Show all posts

Friday, October 15, 2010

Domo kun Mittens

My daughter has been searching Ravelry for free mitten patterns and has picked three for me to knit for her. She has decided I should start on the easiest pair first in the hope that she'll have a pair to wear before it gets too cold. Smart girl, no?

Since the Domo kun mittens I've cast on are only a 1" tube of fingering weight ribbing in Knit Picks Gloss, here's my inspiration pic instead!


I'm going to make full mittens, rather than fingerless and I'll probably make a square top so that it's more like Domo's head.

Thursday, June 3, 2010

What to do with a bit of Bamboo

After spinning up the little samples of bamboo and milk fiber, I wanted to use them for something. I've mentioned before that B hates wool, so I decided to knit up a pair of bamboo mittens. The main yarn was repurposed from a pair of Lily of the Valley socks that she found didn't fit the way she liked.


These mittens are so far being received quite well. I'm using my generic mitten pattern (see the sidebar) and cast on 48 sts. I love the subtle stripes the little sample yarns created!

Wednesday, January 27, 2010

Generic Mittens: The Thumb

I can't wait to finish these mittens - I love them so much I want to wear them now! I've finished one thumb and just have the other one to go. I had said to my dd that I only had one more thumb to finish. "How many thumbs have you knit?" she asked.

step one: how many sts
Remeber your calculation for Thumb Gusset Sts from step 3 of "Generic Mittens: from Wrist to Thumb"? I had 18 sts - you might have an odd number. Add two to this number - these are the sts on the outside of your markers. Now add two more - these are the sts you'll be picking up. That would bring me to 22. Sometimes I pick up more sts if I feel the gap looks too big - maybe 4 sts, like I did this time. I had planned to decrease back down to 22 sts for the thumb, but I forgot.

If you're doing the other kind of thumb, the one without the thumb gusset, you'll need to refer back to your calculations too. Pick up an equal amount of sts as you have on your stitch holder. You might also like to pick up an extra sts on each "end" to help close any gaps that may form there.

step two: transfer sts from stitch holder
I put 8 sts on each of 2 needles and 4 on the last of the three dpns. I picked up 4 sts and put them on the needle too.

For either type of thumb, once you've transferred your sts from the holder to your needles and picked up the required number of sts, you'll knit even until your thumb is long enough.

Here's my thumb sts ready for knitting

step three: start knitting the thumb
I usually start knitting my thumb at the top left point (see photo above), starting with the sts I picked up. This time I didn't trust myself to get the st pattern right if I started there, so I started at the bottom point, where I could read the pattern from the previous rows. Knit in your chosen pattern until the thumb length equals Measurement #6: Thumb Length from "Generic Mittens: Getting Started". If you're knitting for yourself, you can also just try the mitten on at this point and stop knitting when your knitted thumb is as long as your flesh-and-blood thumb.

step four: decreasing the thumb tip
Do a round of k2tog. Then break your yarn, thread the end onto a darning needle and pass the tail through each of the remaining sts. Pull tight, draw tail to the inside of the work and secure the end. Depending on your pattern you may need to adapt this decrease row. For my mitten pattern, I needed to do the decrease row using my CC, so I ended up having a MC patterned row as my final row. Other patterns might require you to (k3tog, k1) instead of k2tog around. Do what looks best!

step 5: finishing
Weave in and trim all your ends - in my case there are 232 ends to weave in. It may take me a while. Block your mittens if you'd like to, or if you're like me and have problems waiting, wear them immediately!


I may do that even before I weave in all the ends. I'm trying to convince myself they are just like thrummed mittens this way.

Monday, January 25, 2010

Generic Mitten: Decreasing the Top

There are two different ways I typically decrease for my mitten top - depending on which way works best with the pattern I'm using.

Side Decreases
Sometimes I decrease only on the sides of the mitten: decreasing 4 sts for each decrease round. This is my personal favorite: and my friend's mom recently asked me "Why do you do it that way?" She thought it was quite different. Me, I love how it looks! Please feel free to do the decreases for the top of your mitten in whatever manner makes you happy!

Evenly Distributed Decreases
These decreases can be either stacked to make a nice swirling line from the beginning of the decreases to your mitten tip, or staggered to be less visible (apparently, my friend's mom's approach!). If you're planning on using this decrease, knit another 0.5 inches in pattern before beginning your decreases.


Here's my mittens with the Thumb-to-Pinkie-Tip portion and the top decreases finished.

Side Decreases
step 1: where to decrease

I like to have a column of four sts starting when my decreases do and running up to the top of the mitten. It looks nice with a 2sts column too, and that's actually what I'm doing with my sample mitten, since that works better with the stitch pattern. You won't be able to get a column smaller than 2 sts, since it's the left and right leaning decreases that help to define the column. I'd strongly suggest placing a marker at the halfway point. When I don't - I always mess up and have to rip back. So you'll decrease somewhere near the start of your round, twice near the middle of your round and once near the end. The exact place, depends on how many sts you'd like running up the side of the top.

step 2: do it!
This will make a 4sts column
Round 1: *k1, ssk, knit to 3 before marker, k2tog, k1* repeat once more
Round 2: knit
repeat these two rounds until you have half of your original sts. For my sample that would be 54 / 2 = 27 sts. In order to bind-off using a three-needle bind-off or to close the mitten tip by grafting you will need to have an even number of sts. I've decided to go with 30 sts: 15 sts on each needle. And I used a three-needle bind-off.

I'm quite happy that I ended up with 30 sts. Usually I'd get 31 or something, indicating that I'd missed a decrease somewhere. It's probably good you couldn't see me grinning to myself just after I'd finished counting - you might have thought I was just a bit too easily amused!

Even Decreases
step 1: where to decrease

I usually use 6 sts per round for this type of decrease. If you'd like to have a more rapidly decreasing mitten top, throw in a few more per round. Divide your total number of sts by 6: in my case 54 / 6 = 9. This means that I should place a marker every 9 sts on the last round of knitting before the decreases. I should tell you, I don't normally do this. I can usually tell where to place the decreases without placing markers. You know yourself best, put markers in if needed.

step 2: do it!
This will make nicely stacked decreases. For staggered decreases, follow the instructions in the [] as well.
Round 1: *k7, k2tog* repeat from * to * the end of the round
Round 2 and all following even rows: knit
Round 3: [k3, k2tog] *k6, k2tog* repeat from * to * the end of the round [k3]
Round 5: *k5, k2tog* repeat from * to * the end of the round
Round 7: [k2, k2tog] *k4, k2tog* repeat from * to * the end of the round [k2]
Round 9: *k3, k2tog* repeat from * to * the end of the round
Round 11: [k1, k2tog] *k2, k2tog* repeat from * to * the end of the round [k1]
Round 13: *k1, k2tog* repeat from * to * the end of the round
Round 14: k2tog around

Break yarn, leaving tail long enough to thread onto a darning needle. Pass the needle through each of the remaining sts and pull tight. Secure end and trim.

Next: "Generic Mittens: The Thumb."

We're on the homestretch! I hadn't realized when I started these mittens how long this stitch pattern would take. I can normally zap off a pair of worsted weight mittens in 2 or 3 nights. It's a good thing I'm completely in love with this pair or I might have given up and started a worsted weight pair just to finish the tutorial!
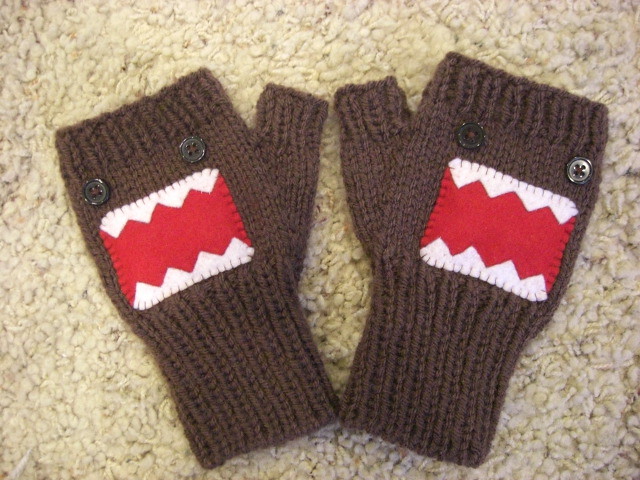
Wednesday, January 20, 2010

Generic Mitten: From Thumb to Pinkie Tip

Ok! So here are my mitts with the thumb stitches snuggled onto a stitch holder. You may notice that I've knit a few rows past the thumb sts already.


From "Thumb to Pinkie Tip" is most likely the easiest part of the mitten, depending of course, on whether the stitch pattern you are using is simpler than the ribbing you chose for your cuff.

step 1: count your sts
You should have the same amount of sts that you calculated you'd need for your hand diameter. If it's off by a stitch or 2 this may be ok. If your stitch pattern needs a certain amount of sts, or if you're using super bulky yarn and a single stitch might make your mitten 1/2 inch smaller, you might want to consider increasing for the needed sts evenly across the first row after the thumb sts have been set aside.

I counted mine: I have 54 on the left mitten. I needed 54 - this makes me quite happy as that rarely happens. Sometimes I rip back to where I messed up, sometimes I just leave it. Like on the right mitten. I have 52. I fudged it a bit. I think it will work out ok.

step 2: knit happily
Carry on knitting in your chosen pattern until your mitten Measurement #5 (Hand Length) from "Generic Mittens: Getting Started" equals the length of your mitten when measured from the end of the ribbing.

And that's all there is, there isn't anymore! (kudos to anyone who knows what book that's quoted from!)

I'm off to bake a cake for M's birthday and get ready for his party this weekend. "Generic Mitten: Decreasing the Top" will hopefully be posted early next week.

Sunday, January 17, 2010

Generic Mittens: One Step Forward, Two Steps Back

So I've reached a common stage in my mitten making process. The frogging and restarting stage.

I've knit two cuffs and was nicely progressing on the Wrist to Thumb section (instructions still in-the-works), when I realized a few things.


I believe I mentioned that this particular stitch pattern really sucks up row gauge. I had thought to myself that it also comes out wider than my typical stitch gauge for fingering weight yarn. As with many a trip to the frog pond, this realization failed to fully register. You may recall that I cautioned that you should base your cuff sts on a stockinette stitch gauge if you're using a cabled pattern. This would prevent your cuff being too wide. Even after that tidbit that I passed on to you, I failed to notice that if a stitch pattern is wider than the typical stockinette stitch gauge, and you base you cuff sts on that number, you will get a cuff that is tighter than you might expect.

So while I have two cuffs knit to my prefered length of 3 inches, they are a bit too tight for my liking. I was going to ignore it. So I carried on and began working on the wrist to thumb section of my mitten, including the increases for the thumb gusset. I love how this pattern is looking. I love how colorful it is, but I messed up on the pattern in a few spots and have noticed that a few things I typically do with the increases for the thumb gusset won't work as well with this stitch pattern. So it's being frogged.

New Cast-on Math:

My typical stockinette stitch gauge: 7.5 sts/inch
My hand diameter measurment: 8.25 inches

8.25inches x 7.5sts/inch = 61.875sts

So I'll be casting on 62 sts for my new K1P1 cuffs.

I'll post "Generic Mittens: From Wrist to Thumb" as soon as I have my cuffs knit to my prefered 3" long. Boy that sounds like deja vu!

Now I just have to remember to decrease back down to 54 sts before I begin my patterned section!

Thursday, January 14, 2010

Generic Mittens - The Cuff

My gauge swatch is done. And yes I cheated a bit. I don't have quite 4 inches wide and 4 inches long. It's more like 4 x 2.5. But it's my swatch and I was getting tired of it. So I stopped and measured. I used 2.25mm (US #1) needles. I usually use 2.0mm (US #0) needles for fingering weight yarn, but all my gajillion sets of 2.0mm dpns are deeply involved in other projects.

Stitches per Inch: 6.5
Rows per Inch : 14


This stitch pattern really sucks up the row gauge. I'm hoping that will translate into very warm mittens.

I have no idea what the stitch pattern is called. If you know the name, let me know in the comments! It's a 4 round repeat:

Round 1: With MC (in my case the recycled gray sock yarn) *knit into the stitch below, k1* repeat from * to * for the entire round
Round 2: With CC1 (various warm Phat Fiber Samples) purl
Round 3: With MC *k1, knit into the stitch below* repeat from * to * for the entire round
Round 4: With CC2 (various cool Phat Fiber Samples) purl


Before we begin with the cuff...

step 1: what type of cast-on
Have you decided on what cast on to use? When I make mittens it's usually a case of my-hands-are-so-cold-I-need-mittens-right-now. I've only done a tubular cast-on once, and that was on something I frogged, although not because of the cast-on. So I'd find it takes me a lot of mental power to do a tubular cast on when I want the knitted object NOW. But I do want the cast on to be stretchy, so I use a long tail cast-on, using a needle approximately 3 times the diameter of the needles I'll use for the mitten.

step 2: ribbing decisions
Have you decided on ribbing? I love the way a K1tbl,P1 ribbing looks, although I find K1,P1 to hug my wrist a little bit tighter. Strange, I've always thought. I would have guessed that the twisted knit ribbing would be more elastic, but it seems to stretch out more quickly, although that may be due to a number of factors. I haven't been all that scientific about it. My twisted knit ribbed mittens are made of different yarn that the other pairs I wear and I also wear them more often, so don't take my observations as fact. I like K2P2 ribbing too, but like the knitting rhythm of K1P1 better. So when I want mittens fast, K1P1 it is!

step 3: how many stitches
Finally we are ready to figure out how many stitches to cast on.
If your stitch pattern is heavily cabled or pulls stitches together like cables would, you will want to base your cast-on sts on a stockinette stitch swatch. Just remember to make some increases after the cuff, so that you'll have enough stitches once you begin your cabling. Look back at your sketch where you recorded your measurements. Or you can use my measurements from yesterday - I'd love it if you knit me mittens! Take measurement #1, Hand Diameter, and multiply it by your stitches per inch. For the stitch pattern and needles I'm using, I get 6.5 stitches per inch. So I will cast on:

8.25inches x 6.5sts/inch = 53.625 sts

Obviously it will be pretty tough to cast on 53.625sts, so I round up to the nearest even number for K1P1 ribbing. If your making K2P2 ribbing, make sure you can divide your number by 4. If we rounded this up to 54sts, it would work for K1P1 but you'd need to cast on 56sts for K2P2 ribbing.

How many will you cast on?

________________x_____________=___________
#1 Hand Diameter___Your sts/inch___Cast-on sts

Round up to the nearest even number and you're ready for some K1P1 ribbing!

Make your cuff as long as you like cuffs to be. For me that's 3 inches.

Once I have two cuffs that measure 3 inches from the cast on edge, I'll post "Generic Mittens: From Wrist to Thumb".

Tuesday, January 12, 2010

Generic Mittens - Getting Started

One of the comments to my Olympic Mini Mittens offers a pattern for sale for adult sized Olympic Mittens. I kind of prefer the one's for sale at HBC and Zellers: something about the color work in that pattern just doesn't have the detail that is my personal preference. I think if I were to make a pair of Olympic Red Mittens for myself, I'd probably embroider the rings and slap on a felt maple leaf as I did for the Minis. I just like the look better. That, and I have never really felt the need to buy a mitten pattern. A want perhaps - Eunny's Anemoi's for example, but then they are some pretty, special mittens. I usually just wing it with the generic mitten pattern that I found bouncing around in my brain. For those of you who weren't born with mitten patterns ricocheting of the inside of your skulls, I thought I'd share my process. Because it really is more of a process than a pattern for me.

step 1: pick your yarn
I've used fingering weight sock yarn, sport weight yarn, worsted weight yarn, handspun, bulky weight yarn. If you like it, use it. The only thing I try to stay away from are yarns that will pill too quickly.

step 2: choose your needles
Check the ball band for your chosen yarn. Note the needle size suggested. Go down a few sizes. I like my mittens to be a bit wind resistance. I use dpns for my mittens; if you prefer another method of knitting in the round, feel free to use that. When I use worsted weight yarn, I usually use US 3/3.25mm needles. For fingering weight: US 0/2.0mm needles.

step 3: knit a gauge swatch
I know, I know - I hate knitting gauge swatches too. But this will really help your mitten to fit your intended recipient. Cast on enough stitches to make a 4 inch wide square. Knit in your intended stitch pattern for 4 inches. For the most basic mitts, I usually use stockinette stitch. If you're already familiar with the gauge you'd get using your chosen yarn, the needles you decided on in Step 2, and the stitch pattern you intend to use, you can skip this step.

step 4: measure your row and stitch gauge
If you're printing these instructions out, grab a pencil and record your measurements here.

Stitches per Inch: ________ Rows per Inch : ________

step 5: trace your hand
Use the back of your printout if you'd like to have everything in one place.


step 6: measure your hand
Note the spots on my hand sketch above. Use a tape measure and record your (or the recipient's) measurements on the same spots of your tracing.

My measurements are:
1: 8.25 inches
2: 3 inches - I like a long cuff!
3: 3 inches
4: 2.5 inches
5: 6.5 inches
6: 2.25 inches

Tomorrow, we cast on. A few things to think about before tomorrow...

What kind of cast on would you like to use? Tubular, long tail, knitted? How long do you like your cuffs? Do you prefer K1P1 ribbing, K2P2 ribbing, cabled ribbing, corrugated ribbing?

Saturday, January 9, 2010

Mini Olympic Red Mittens

We are big Olympics fans here. Both kids asked Santa for Olympic Red mittens - as they were nearly impossible to find before Christmas. With the assistance of a special elf, Santa delivered and both kids found the red mittens in their stockings Christmas morning.
.

M recently asked me to make a pair for his bear, and these are the result. Quatchi was more than willing to pose, as Pooh bear is slightly embarrased by his exteme lack of fur.
.
If you'd like to make a pair of mini Olympic Red Mittens for yourself, the PDF is available as a free Ravelry download.
.
** download now**
.
.

.

Saturday, December 12, 2009

I love Robots

The mittens I made for my nephew for Christmas were too small. So it's back to the knitting, because I didn't want his whole family to have new mittens, but not him. This time round, I decided to modify Grace Schnebly's Love Bytes mittens.
.
.
I didn't want to do color work on the whole mitten, so I whipped up a generic mitten, with the robot motifs intended for the cuff, placed around the bottom of the hand. These are far more plain than the pattern intends. I will definately make a pair that follows the pattern exactly - I love the larger robot motifs too. I love how these are working out, and am quite sure this pair will fit.
.

Wednesday, December 2, 2009

Another Mitten?

My daughter stole my mittens, again. Apparently they match her coat. So I dove into my stash to find something that would make quick comfy mittens for me. And I found my lovely skein of Cashnyro Luxury that I won from Northern Light Fiber Co.
.

.
I love how this is knitting up. It's so soft and smooshy and the colors are beautiful. This is a sportweight sock yarn that is 80% merino, 10% cashmere and 10% nylon. Northern Lights current line of Cashnyro is closer to a fingering weight: she currently has three colorways listed in her shop. .If you want a pair of mittens like mine, or some soft, smooshy socks, I'd highly recommend buying a skein (or more) of this yarn!
.

Friday, November 27, 2009

I Finished a Pair of Mittens

I love how these mittens turned out. They are supposed to be for the gift exchange for G's work Christmas party. Although I am very tempted to keep them for myself I have decided that either I make sure I leave the party with them, or I'll have to make myself a pair!.

For the thumb:
You'll have 19 sts on a holder when you finish the hand. Tranfer these sts onto 3 dpns. Pick up 3 sts where the thumb joins the hand. Arrange the stitches so you have 8, 8, 6 stitches on your 3 dpns, the first stitch should be a knit stitch. Knit 15 rounds in k1tbl, p1 ribbing.

Decrease round 1: [k3tog through the back of the loops (k3togtbl), p1] 5 times, k1tbl, p1, 12 sts.
Decrease round 2: [k3togtbl, p1] 3 times, 6 sts

Break yarn and thread end into a darning needle. Pass the needle through each of the remaining sts and pull tight. Weave in ends.

Thanks to Eunny for the inspiration!

Monday, November 23, 2009

Apparently I can't get enough of Eunny!

I finished my sister's Anemoi mittens on Friday evening. They are beautiful! Early on I was a bit worried I wouldn't have enough handspun to finish, but I ended up with more than enough. These will be on their way west shortly.
.
.
But empty needles have a way of filling up quickly! And the thoughts of new projects have been whirling in my head even before I finished the Anemois.
.
I wanted to knit another pair of mittens for the gift exchange at G's staff party. It's the sort of exchange that's a bit of a game. You draw a number out of a hat. Number 1 gets to choose any gift to unwrap. Number 2 can steal Number 1's gift, or unwrap a new one; Number three can steal Number 1 or 2's gift or choose something as yet unknown, etc... I thought of knitting these, but G nixed that being a die-hard Canucks fan. "How about something cabled," he suggested. I didn't even know he paid enough attention to my knitting to know what cable was! So I tweaked a pattern I love, Eunny's (again) Bayerishe socks to make a worsted weight mitten. I wanted these to knit up fairly quickly. I do like G's co-workers and spouses, but fingering weight mittens I reserve for those I love. These are modeled after my favorite mittens.
.
.
Details:
Patons Classic Wool "Dark Grey Mix"
3.25mm dpns
.
CO sts 56 sts.
Work 6.5cm k1tbl, p1 ribbing
.
Cable set up row: *(k1tbl, p1) 6 times, k1tbl, m1 purlwise, purl into the front and back of the next st, m1, k1tbl, m1 purlwise, p, m1 purlwise, (k1tbl, p1) 6 times*. M1, place 2 markers - this will be the thumb gusset. Repeat from * to * once more [67 sts].
.
Follow charts C, D and A from Eunny's Bayerishe Sock pattern, including a k1tbl between each chart. For the thumb gusset, m1 purlwise between the markers on the first round and then m1 (either purlwise or knitwise) on the inside of the each marker every following three rows, maintaining a k1tbl, p1 ribbing between the markers. Once you have 17 sts between the markers, transfer these 17 sts plus 1 on either side to a holder and CO 1 over the gap. Continue working the charts for the hand. Once you have worked 3 repeats of Chart D, follow the chart below (beginning where the row is marked "1") for the mitten decreases. Turn mitten inside out and work a 3 needle bind off.
.
.
Maybe I should go work on my Print O' the Wave shawl now too!
.

Friday, November 20, 2009

Back to the Knitting!

It's been a while since I've been able to find time to work on this pair of Anemoi's. I love this pattern, and can't find enough ways to say it. I can knit without looking at my hands when I'm just doing stockinette stitch, so I read the pattern with my eyes and follow with my fingers and find the rows just zipping by. I love the regular repeating patterns of the palm and thumb, how I know what it will look like as it knits up. And I love the organic swirls on the back of the hand, how after knitting along for several rounds I can look away from the pattern and see the swirls taking shape in my knitting.
.

.
I forgot to repeat my mistake on this mitten in order to produce a matching pair. So I'll just have to carry on for three more rows once I've finished the patterned section so that they will at least be the same length.
.

Monday, September 14, 2009

I think it is the coffee

I had another small coffee from Tim's this afternoon. Same as on Friday, I felt jittery and distracted. Must be much more sensitive to caffeine than I used to be. But I did finish one Anemoi...
.

.
It seriously needs to be blocked and I haven't sewn in any ends. I'm still debating whether to rip out the mistake and I'm not sure if I'll have quite enough handspun to finish the second mitten.
.
The IDEA continues...
.

Thursday, September 10, 2009

Arrrggg!

Can you see the mistake? It's not glaring, but it's there. And it's messing with my mind. By the time you reach the top of the charts for the front and back of the Anemoi mitten, the pattern is supposed to be the same. But mine is out by one row.
.
.
I have a little slip of paper with restickable tape on it that I move up every three rows. Apparently I forgot to move it up, and I've repeated three rows. Can you see it now?
.
.
Arrrgggg!
.
I'll finish this mitten and its mate. If it still bugs me, I may frog to that point then and reknit.
.

Wednesday, September 9, 2009

The problem with Startitis...

... I have too many projects to knit on now!
.
I've been knitting on the IDEA non-stop since Saturday evening and decided a little break was needed. I've got the pattern printed up and it just needs to be tweaked, but it was getting a bit monotonous - I don't think I'll ever manage to knit on only one project at a time. So here's the recent progress on the Anemoi's
.
.
Loving the way the Gloss is working with my handspun!
.

Sunday, September 6, 2009

A Wicked Case if Startitis

All day Friday, I was feeling restless and unsettled. Like I had creative energy with no where to direct it. I knitted on the Print O' the Wave (still loving it). I started on some Anemoi mittens for my sister (love Eunny's patterns). I considered starting a Cisco hat, but didn't have yarn I wanted. I briefly considered spinning something to use, when I realized if I let this continue I might cast on for 20 projects before nightfall. (I'm still considering the spinning - probably a collection of Phat Fiber samples all spun into a fun colorful yarn, just perfect for a friend's baby's head!)
.
I decided to clean the kitchen to gain some perspective. It took three times as long as normal - I kept being distracted by my stash. Then I did laundry, but the yarn and needles continued to call. I sat down with a cup of tea and sorted through patterns that I want to knit, yarns I want to knit with, my notebook of original ideas... and still I felt that strange uneasiness... could it have been that small coffee I had just before lunch? I know I don't drink coffee much anymore, but Tim Horton's must have really amped up the caffeine for me to be unable to focus on anything.
.
Then my responsibilities rescued me for a while - B had skating, supper needed making, M had skating, had to put the kids to bed. G went to bed early, just after the kids, so I sat down with another cup of tea, feeling much calmer than I had earlier in the day.
.
I picked up the Anemoi I'd started earlier in the day to frog it as I realized I wouldn't have enough of the peachy handspun to finish both mittens if I did a corrugated ribbing for the cuff. I cast on again and just as I finished the cuff in the lovely cocoa Gloss an IDEA hit me!
.
.
I've been working on it non-stop and am loving it! But until I'm ready to reveal this cool pattern, I'll be showing more Print O the Wave and Anemoi!
.

Monday, July 20, 2009

It's so cold I'm singing Jingle Bells

Although today is turning out nice, we've had a few mornings when it's been only 5 degrees Celcius. It's strange how cool weather turns my thoughts to knitting. No, actually, I knit all the time so the cold weather just makes me feel it's justified!
.
I'm continuing with the Christmas knitting. I decided to start some Urban Neccesities (ravelry link) for my BIL. I've got one done, and am midway through the increases for the thumb gusset on the second.
.
I took a brief break from knitting to make up some gift bags with fabric that I had in my stash. Yes, I also have a fabric stash. And no, it's not quite as large as my yarn stash. I'm quite happy with how these turned out.
.
It's possible I might finish the Urban Neccessities before we leave for our trip... but we'll see.

Friday, July 17, 2009

Christmas in July

We'll be off in a few weeks to visit my family. It will be great to see my siblings, their spouses and my neices and nephews again. It's been two years, sigh. Fortunately I've seen my parents a bit more often than that. They were here for a visit last fall and it will be good to see them again too. So... because I hate paying postage, I'm in a flurry of Christmas knitting.
.
I've already made a pair of mittens for my sister's youngest,
.
but now I have a pair for her boy too.
.
For my sister's oldest, I paid for her to take a drop spindle class for her birthday a month ago, and so this is for her Christmas present! This spindle is similar to the one I made for me out of a bead from Michael's and a nicely carved dowel.
.
I plan to make a pair of Anemoi's for my sister and some fingerless gloves with a flap to cover the fingers for my BIL. These I won't likely get to until later, but at least I won't have to worry about the spindle getting damaged in the mail.
.